November 30, 2015

My Red Dwarf Regency Dress

A little while ago I picked up some spotted voile at a good discount as there was a lot of water damage to the roll. After washing it I reckoned I could work around the discoloured patches that were left and use it to try out the Laughing Moon bib front dress pattern.

I chose the full gathered front and short sleeves. It's very close fitting, I think I'll use the next size up for the next dress, but overall I'm pleased with the result! I'm calling it my Red Dwarf Regency dress because I went through several series of it on in the background while making it and think I'll now forever connect the two! :)


The underbodice closes with three ties. Then the bodice front is secured over it with straight pins or a few stitches.


My plan is to wear this on one of the evenings of our annual Coopershill Historical House Party so that I can have triple helpings of all the lovely food with no corset to get in the way!


Only the bodice is lined and I'm wearing it over my tucked bodiced petticoat. I'm being very naughty and not wearing a shift as I need to make a new one that doesn't have enormous sleeves.


The traditional fashion plate wedgie pose


November 01, 2015

A Quilt For A Baby Girl

A dear cousin had her first baby recently, a little girl, and as everyone I'm close to has to suffer my homemade presents I decided to make her a quilt!

Although I've done a little quilting on various things in the past this is the first proper quilt I've made.
There is a lovely local quilting shop, Apple Tree Crafts, with delicious fabrics, going there is like going into a sweet shop! The staff are so nice, they even make you cups of tea to have while you browse! They gave me great advice and I came home with some lovely fabrics. The batting I used was bamboo.


I found a lovely hour-glass pattern and tutorial online here and originally as it was for a girl I was thinking of something similar colour-wise in pinks but in the end was drawn to far more gender neutral fabrics and I actually prefer that really. Who says you have to have pink for girls! And this way it will do for any future babies too.


The finished quilt!

I was a bit worried that some of the fabrics weren't densely enough coloured or patterned, the owl one really, as when paired with the white it got a bit lost. Plus the colours seemed rather dull for a baby when put together, but with the blue border and backing I think it came together well in the end and I'm really pleased with it!


I really enjoyed making this and can see how quilting can become addictive! I will definitely be making more in the future! :)


August 01, 2015

A Quilted Sun Bonnet

I enjoyed making my last bonnet so much I thought I'd make another, this time a Victorian sun bonnet using Romantic History's wonderful tutorial. It was super quick to make and very easy.  A nice project for a wet summer afternoon with the hope of better weather to come! 


The brim is quilted in a diamond design and the edges are piped. The brim can be folded back out of the way when you need to see a little bit more around you. I'd quite like to make another in a sheer fabric and cord the brim instead.


July 13, 2015

A Regency Close Bonnet

HSF Challenge #7: Accessorise

One day last week I felt like putting on some radio comedy, eating chocolate and making something pretty! It had to be something easy, relaxing and that wouldn't tax my brain too much. A hat fit the bill and I pulled up the YWU tutorial for a Regency close bonnet. After it was made I realised that it fit perfectly into the July HSF challenge! Yeay!

I wanted to make something along the lines of these bonnets...


Not so much like these...


I followed the tutorial pretty closely, only shortening the brim by about an inch and a half though on reflection I might have left it the original length. What at first seems a ridiculous length of brim is considerably shortened when you add in things like hairstyles.


The brim is one layer of buckram (a bit of an experiment as I usually double up on the buckram) wired on all sides and the soft crown is just two layers of cotton lawn. I quilted the brim with two layers of curtain interlining and used narrow ribbon to mark the quilting lines. The inside of the brim has another layer of interlining and a cotton lining on top of that.

I had bought lots of paper flowers in different colours when I was visiting my sister in Bakewell and I used a purple bunch for the bonnet.

All in all it worked out pretty well though I messed the crown up a bit, the lining inside is a bit tight and I somehow managed to sew it on sort of off-set and not centered. Trying to compensate for that by making little tucks only exacerbated the too tightness of it that the lining was already doing! I don't think it mattered too much in the end though.


You do have a kind of tunnel vision effect when wearing it and I can hear my voice echoing when I talk which is kind of novel! Also realised that currently the only Regency day dress I have is kind of orangey/red... Not the best match for a purplely/lilac bonnet! But there is lovely cream linen just waiting to be made into a day dress sometime soon that will go nicely.

Looking at an enormous spider on the wall!


What the item is: A close bonnet c.1810

The Challenge: Accessorise

Fabric: Buckram, cotton lawn, curtain interlining,

Pattern: YWU Tutorial

Year: c. 1810

Notions: polysatin ribbon, paper flowers

How historically accurate is it? Hmmm the pattern is accurate and it's mostly hand sewn but the fabrics include synthetics so I'd guess maybe 75% historically accurate

Hours to complete: Made it over several days, picking it up for an hour or two at a time.

First worn: Yet to be worn!

Total cost: All stash items except the ribbon so about €10

June 03, 2015

A Corded Petticoat

So I'm only now really getting back my own sewing mojo after a prolonged period of commercial sewing and other stresses. The feeling of sewing for pleasure again, with no deadline or pressure is rather nice! But kind of slow going so I apologise for the lack of posts :)

I ended up picking up a project that I had gathered the materials for about four years ago and then left in a bag at the bottom of a box, a corded petticoat.


I've been thinking of making a late 1820s / early 1830s dress with some yummy gold silk that I have so I made this corded petticoat with that silhouette in mind. I'm pretty sure though that it will be useful for lots of eras!

I used cotton sheeting and had a whole roll of cotton piping cord, about 1/4" thick, and ended up pre-washing both, just in case. For the cord I took it off the roll and dunked it into a sink of hot water and left it there for a while crossing my fingers that it wouldn't get too tangled between washing and drying!

I did a bit of research and it seemed that corded petticoats were most successful when not too full so I decided on an 86" circumference for my petticoat. There are a few ways of making a corded petticoat but what I went with was to sew up my panels completely into the skirt and then corded it. If you leave one seam undone, cord it flat and then sew that final seam up it can cause it to dip in a funny way.

I made the petticoat about 20" longer than I needed and then simply folded the extra up, put the first row of piping cord in that fold and then each subsequent row was sewn between the two layers.


It takes longer than you think, even with a piping foot! I didn't go too far up as it was a 20s/30s look I was going for but when I make one for an 1840s impression I'll go right the way up close to the waist.


It gives quite a nice effect, not too pronounced but definitely adds volume where it's needed! So that's it, just a nice simple petticoat :)

March 12, 2015

HSF '15 #3: 1850s Velvet Cape

This weekend I'm heading off on the IHC's annual historical house party at the gorgeous Coopershill House in Sligo. We privately hire the 18th c country house and spend the weekend pretending to be lords and ladies complete with candlelit dinners and canopied beds! :) Expect a post on it soon!

Although I had lots of elaborate plans for new gowns in the end I decided to take the pressure off and only make one thing which I sorely needed, some warm outerwear. As this month's challenge was "Stashbusting" it fitted perfectly with my plans to make a warm cape out of the leftover fabric from my bedroom blind! It was all I had that was remotely suitable and at first I wasn't too keen on it but once it was cut out I fell in love with it! So I hope you like it too!


The velvet was as velvet always is, a bit of a pain to work with and walked around the place a bit but I more or less got it to behave with lots of tacking from the get go. I wanted it to be warm so I interlined it with cotton domette which looks almost exactly like cotton batting but is much cheaper. It makes it snugly warm! It's then lined in black cotton calico.


The trim is taken from a fashion plate that is shown in the book alongside the pattern and dates from the same period. I really like the effect of the two widths of black velvet ribbon against the red.

My trim is inspired by the lady on the right

I really wanted to make a muff to go with it, I even got some cute tassels, but I haven't got around to that yet.

What the item is: An 1850s Cape

The Challenge: Stashbusting

Fabric: Some sort of textured velvet interlined with cotton domette which is very like batting but half the price and lined in black cotton calico

Stashed for?: Originally it was to make some cushions to match the blind but that was never going to happen! Had it about two or three years.

Pattern: I used a pattern from Jean Hunnisett's book "Period Costume for Stage and Screen", pattern sheet no. 18a. It's a pattern taken from an original garment, an 1850s green velvet cape. All I changed was a slight adjustment to the shoulder seam so it sat better on me and I added a collar similar to one in the fashion plate.

Year: approx. 1854

Notions: Velvet ribbon, three fur/coat hook and eyes

How historically accurate is it? The pattern is taken from an original garment, the fabric is sort of accurate I think and the trim, although polyester, is taken straight from a fashion plate of the same year. It's machined but it is 1854 so I'm going to say I can get away with that so maybe 90% historically accurate.

Hours to complete: Hmm spent a week tipping away at it a few hours here and there each day. I was rather slow and unhurried about it.

First worn: This weekend!

Total cost: The velvet outer fabric was from the stash but the domette interlining, cotton lining and ribbon I bought so about €40 probably.

February 08, 2015

Some Project Plans for 2015

I have a feeling that, mostly for economic reasons, this will be a stash busting year. I'm going to try to limit myself to projects that I can make from what I already have. I do have lots of fabric but nothing much longer than 3 or 4 metres so I guess it'll be all regency type dresses and not splendid early bustle poofy confections! I do have several Regency themed events coming up in the near future so it all fits quite nicely.

So I typed all that yesterday and then today I promptly went out to a local fabric shop to finally snap up some fabric that I had been humming and hawing about forever, on the last day of their winter sale, for a Victorian fashion plate recreation that I have been thinking about for years!


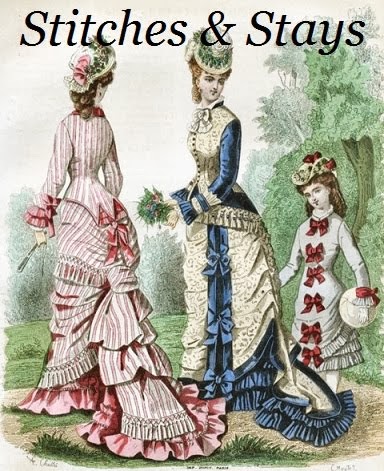
It's a pink and white candy striped cotton for a dress based on the pink and white natural form outfit that is in the masthead of this blog. All I need now is to find a plain pink for the underskirt and accents and I'm all set! The stripes are narrower than in the fashion plate but I don't think I could pull off wide stripes and this was handy and not too expensive so 3mm stripes it is!


I found a close up of the fashion plate and discovered that what I thought were pleats all around the overskirt are actually tassels! I wasn't too sure how I felt about that but after reading a great article from Your Wardrobe Unlockd on how to easily make yards of tassels I think I'll just go the whole hog! I can see myself spending long evenings tasseling but it'll definitely make for a more unusual dress! Oh! Maybe this will fit nicely in with the June HSF theme "Out of your comfort zone", making millions of tassels is not something I've done before, whether it'll all get done by then though I don't know.

Millions of tassels...

The other stuff I have on the list to make, and that I have all the fabrics for already, include...

- A cream linen long sleeved regency day dress
- A white cotton voile regency short sleeved / ball type dress
- A gold silk regency ball gown
- A spencer or Pelisse in either a blue velvet or a blue linen
- A regency bonnet or hat
- A brown linen 14th century kirtle and veil/head dress

Some of the Regency stuff will need to be made first and there will be more on those in future posts. What will actually get made remains to be seen! I don't want to rush anything or put myself under too much pressure, there's been enough of that the last six months, so we'll see what happens! 


February 03, 2015

Historical Sew Monthly 2015: #1 Foundations

I've always wanted to participate in the HSF but never had the time so when I saw the HSF changed to a monthly challenge for 2015 I thought I'd give it a go.

I'm slightly late in posting this but I did get it made in time, just wasn't able to get photos done until now! In the end I gave up on getting proper ones of it on so please excuse the slightly crappy iphone photos!

The first challenge fitted in nicely with my project list as I needed to make a bodiced petticoat to go under a Regency dress that I will making soon. I am quite small chested and didn't want to bother with stays so I hoped this would provide me with super-comfortable support.


 I reckoned the trick for me to getting some Austen era shelf-yness was basically to push everything from the bottom up with a few well placed darts until I got something resembling apples on a tray. And it worked! It was more reminiscent of breast binding than "lift and separate" but if it gave me some bosom to heave I didn't mind! And it is comfortable too.

I wanted it to be washable and very easy care so I didn't bother with any boning and just made it to button up the back. I did however use a layer of coutil as my lining in the bodice. I have to have it pretty snug to get the effect and didn't want the fabric to stretch. I found the coutil gave plenty of support and firmness to the bodice on it's own. I don't know if this was the best way of going about things but it seemed to work fine and everything stays in place. I am slightly wondering if I should have boned the back and laced it but worst comes to worst I can replace the back panel and do that. I wanted to be able to throw this in the washing machine so was hoping to get away with it without that.

The back of the bodice

I referred to Zip Zips tutorial in using the Sense and Sensibility regency pattern for making a bodiced petticoat with a few modifications along the way. I also referred to Your Wardrobe Unlockd's article on Regency petticoats. I had a lot of fitting to do to make it truly fit but now I should have a good base bodice pattern for all my future regency projects.

I also realised I can fasten it at the front and then swivel it around to the back and then put my arms through the straps and wriggle it up with a few adjustments so I can even dress myself to levels of decency before having to ask for help which is good.
I also included a few good sized tucks at the hem to help it hold it's shape and because I like the look of them :)

The Challenge: Foundations

Fabric: Cotton sheeting, coutil from the stash

Pattern: Based on the S&S regency dress bodice pattern and Zip Zips bodiced petticoat tutorial, with modifications

Year: The shaping is 1810-ish but could be used for earlier or later

Notions: Four buttons

How historically accurate is it? It's machine sewn and I'm not too sure if a bodiced petticoat was often used in place of stays but the general shape is pretty authentic I guess. Done as a quick job with a few time saving short cuts so not quite the neatest petticoat ever.

Hours to complete: This was something I picked up and put down many times and just worked on gradually but including fiddling around to fit the bodice and a few mock ups would probably take 6 or 7 hrs or so.

First worn: Other than dancing around my bedroom it has yet to be worn!

Total cost: Around €20


Gratuitous cat pic